You may be wondering where I have been since my introduction. Well…all I can say is that second semester senior year has been taking its toll on me. But one of the reasons why I have been gone is that I’ve been working on the subject of this post. Since the start of my second semester I have had to apply for fellowships and potential jobs, but all of them require me to tailor my resume for the specifications of the job. Needless to say, this is possibly one of my least favorite parts of the job search right next to writing cover letters by the dozen. So when I decided to sit down one day and update my resume once and for all – I approached this task with the same enthusiasm as getting dental fillings (which I also incidentally had to do this semester – remember to floss peeps!). In fact my original ‘starter pack’ for writing resumes consisted solely of me looking woefully at my resume, and hoping that it would somehow write itself:

But once I accepted that my resume would not write itself, I decided to approach it with a step-by-step plan. Instead of approaching the entire task (which was too daunting or at least easy for me to procrastinate away), I decided to break it down. With that, here is my guide to writing a (relatively pain-free) resume:
Step 1: The Big Picture

The first thing I did naturally was surf the internet. While I looked at template resumes online, I realized that CP&R provides us with a resource online that allows me to get a better idea of what students with my level of experience have currently as a resume. What is this coveted resource? Their resume book. Okay, so you might be going “That’s your novel advice? I already knew that.” But I can’t emphasize how useful it was to me – these are peers with similar experiences and therefore looking at the different ways with which these students present these experiences gave me an idea of what my resume could look like. It helped me envision what I would like my resume to look like – both stylistically and in terms of content. Of course, I also recommend asking peers, and anyone working in the field you are interested in if you could take a look at their resume. Basically after this step, I would recommend having a rough template in your head of what you want your resume to look like.
Step 2: Brainstorm

Once I had a vague idea of what I wanted my final product to look like, I wondered how I would get there, and then promptly stopped working on my resume. I felt pretty overwhelmed and under motivated (a great combo). But thankfully there’s nothing quite like fellowship deadlines to provide motivation, and once again I went down the path of updating my resume. The next step that worked for me was to simply list all of the experiences (work, volunteer, extracurricular – the whole deal). After I listed them all, I added dates to each of these, and also proceeded to write a short blurb with what I considered the highlights of the experience, along with a reference (or whoever I could contact) for that experience. Now that I had a comprehensive list of all these experiences along with some information about them, I then proceeded to rank them in order of importance for the different positions I see myself applying to (ex: my volunteer experiences in the hospital are probably more relevant than my time spent as a camp counselor for a job in health care). At the end of the step, I would recommend having essentially an annotated list of ranked experiences that you could then list in your resume.
Step 3. Aesthetic

I wasn’t really sure what to call this step – but I can definitely say this step was the most fun I had in the resume-writing process. This is mostly visual step – what do you want your resume to look like? Do you have certain fonts that you prefer? (be warned: you can get lost in typography blogs for hours) Is there a standard structure that resumes follow in the field you are interested in? How do you want to separate your work experience from volunteer experience? Do you want to list the courses you took in college? I recommend surfing the internets once again to check out resume templates, and asking peers/mentors for their input. But at the end of this step, I had a very (very) rough draft of your resume – it had the visual structure that I wanted and some of my experiences as filler (so I could know what it would look like).
Step 4: Synthesis

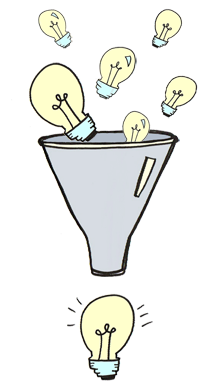
This step is just what it sounds like: use the annotated list of experiences and the bare bones resume you constructed in step 3 and synthesize! For me, having both the previous steps helped immensely as it allowed me to easily fit the two parts together. After doing this, I determined whether my annotated list needed to be added or modified, but after this small step – I now had a resume! And a pretty good one at that!
Step 5: Bug people to look at your resume

Exactly what I said above. After I finished the previous steps, I sent my resume to everyone (and I mean everyone – my friends, parents, professors, my long lost twin sister). And the feedback I got was immensely helpful, although I obviously couldn’t incorporate all of the advice. You can always visit CP&R and ask them to take a look. By revising over and over after all of the advice, I was able to catch any mistakes and create a polished and refined resume.
Step 6: Start applying!!!

Start sending your resume out to all those fellowships and jobs! I’m still doing this step – but I’ll keep you guys posted. *fingers crossed*
And that in a nutshell is Aish’s step-by-step guide to making a kickass resume. Go forth and conquer! (but don’t procrastinate by watching YouTube videos while doing said conquering)
